
Power hiking for trail runners is deliberate uphill walking that preserves speed, control, and energy when running stops paying for itself. I switch before my stride collapses, not after. The goal is not to prove I can keep running; it is to reach the top with the best combination of pace, effort, and legs for what comes next.
After 12 years of running, I see power hiking as a performance skill, not a surrender. On a steep climb, an efficient hike can be faster than a slow bound and far easier to recover from. The runner who changes gait at the right moment often crests ready to run while the stubborn runner is still paying for the climb.
My quick answer: I power hike when my running speed advantage becomes small, my mechanics lose quality, or the terrain demands more control. I shorten the step, lean with the hill from the ankles, keep pressure through the whole usable foot, and choose normal arms, hands-on-thighs, or poles according to grade and terrain.
I treat this as one skill inside my trail running beginner system. Route choice, effort, fueling, gear, and downhill control determine whether the hike actually helps the whole run.
What I Mean by Power Hiking
I define power hiking as purposeful uphill walking with active posture, continuous steps, and a clear performance reason. I am not strolling, recovering from a mistake, or waiting for the hill to end. I am using a gait that better matches the grade and my current ability.
| Movement | What I see | What it costs | When I use it |
|---|---|---|---|
| Efficient uphill run | Quick light steps with stable posture | Higher aerobic and elastic demand | Runnable grade with meaningful speed advantage |
| Collapsed uphill run | Slow bound, long ground contact, rising bounce | High effort for little speed | I switch out of this immediately |
| Power hike | Compact continuous steps and active arms | More muscular walking demand, lower flight cost | Steep, technical, late-race, or fueling sections |
| Recovery walk | Relaxed gait with reduced intent | Lowest immediate demand | Planned recovery, safety, or symptom management |
Power hiking is not failed running
The label matters because it changes the decision. If I see walking as failure, I wait until I am already exhausted. If I see power hiking as a trained gait, I can switch while posture, breathing, and foot placement are still under control.
Power hiking is not the same at every grade
On a moderate climb I use quick steps and a normal arm swing. On a steeper climb I lengthen the force phase slightly and may use hands on my thighs. On a sustained runnable grade I may alternate short run and hike blocks. Terrain chooses the version.
Why I Train Power Hiking
I train power hiking because trail performance includes choosing the right gait before fatigue chooses it for me. The skill gives me another gear between running well and walking passively.
- I can hold a strong aerobic effort on grades where running becomes wasteful.
- I reduce vertical bounce and keep more movement directed uphill.
- I preserve enough attention for footing, fueling, and course decisions.
- I arrive at the crest with a better chance of running immediately.
- I can manage late-race climbs without turning every transition into an emergency.
My uphill and downhill running guide covers the mechanics of both directions. Here I focus on the crossover: the point where walking becomes the better tool.
My Run-or-Hike Decision
I use three tests: speed gap, movement quality, and consequence. I do not use a universal grade because surface, altitude, fatigue, body size, and training history change the crossover.
1. I use the speed-gap test
I compare a controlled uphill run with a purposeful hike on the same segment at a similar sustainable effort. If running adds little speed but creates much more breathing or leg cost, hiking wins. I retest on different grades because the crossover is not one permanent number.
2. I use the quality test
I switch when cadence stalls, each step becomes a bound, hips drop, foot placement gets careless, or breathing controls posture. Those signals tell me the gait has stopped working even if the watch still labels the activity a run.
3. I use the consequence test
Technical footing, exposure, congestion, wet rock, or a heavy pack can justify hiking before the speed gap closes. Control matters more than defending a running identity. I choose the gait that leaves room to change line or stop.
My three-signal rule: I switch when any two of these appear together: the running speed advantage is small, movement quality is falling, or terrain consequence is rising. I do not wait for all three.
For easy climbing I also watch effort. My Zone 2 training guide helps me keep an aerobic day aerobic, but I let grade and temperature explain normal heart-rate drift before making a decision from one watch reading.
My Complete Power Hiking Technique
I build the gait from posture, steps, feet, arms, and breathing. I adjust each part to the hill rather than trying to hold one fixed shape.
Posture: I lean with the hill
I use a slight whole-body inclination from the ankles while keeping ribs and pelvis organized. I do not fold at the waist or stare at the ground between my shoes. Folding shortens useful hip motion and makes breathing harder; looking too close delays line choice.
Steps: I keep them compact and continuous
I place the foot close enough that I can push without hauling my body over a long lunge. The step gets shorter as grade or technicality rises. I want continuous rhythm with no pause at the top of each step and no unnecessary bounce.
Feet: I choose traction before force
I place as much of the foot as the terrain safely allows, load it progressively, then push uphill. On loose ground I soften the push to avoid spinning the surface away. A shorter secure step usually beats a longer powerful step on questionable footing.
Arms: I match the grade
On moderate hills I use an active running-like swing. As the grade steepens, I drive the elbows back more deliberately. When the hands can meaningfully assist the legs, I use hands-on-thighs or poles. I do not carry poles passively while also trying to use a full arm swing.
Breathing: I set the ceiling early
I choose an effort I can sustain before the climb forces the choice. If breathing becomes ragged in the first third, I shorten the step or switch sooner. On long climbs, steady output beats a surge-and-recover pattern unless the course demands a brief move.
This technique sits inside my running-biomechanics framework. Uphill posture and cadence respond to grade; I do not force level-ground form onto a steep slope.
How I Use Hands on Thighs
I place my palms or the heel of my hands on the lower thighs and push in time with each step. I avoid pressing directly onto the kneecaps. The hands assist knee and hip extension while the upper body stays stable enough to breathe.
- I wait until the grade is steep enough that the arm push adds useful force.
- I place both hands above the knees on the muscular part of the thighs.
- As one leg extends, I add pressure through the hand on that side without locking the elbow.
- I keep my gaze up the trail and move the hands only as much as the step requires.
- I return to a normal arm swing as soon as the hill becomes shallow enough.
When I use it
I prefer hands-on-thighs on very steep, stable climbs where poles would be unnecessary or awkward. It also works when race rules, travel, or terrain make poles impractical. I practice it before racing because the upper back and triceps can fatigue when the method is new.
My common correction
If I am bent so low that breathing feels compressed, I shorten the step and raise the torso. More forward fold is not more power. The hands should support extension, not hold up a collapsing posture.
How I Power Hike With Poles
I use poles only when they have a clear job and I have practiced deploying, planting, and carrying them. On sustained climbs they can distribute work and reinforce rhythm. On technical or crowded sections they can also become clutter.
| Pole pattern | How I use it | Best fit | Main mistake |
|---|---|---|---|
| Alternating | Opposite pole and foot move together | Moderate sustained climbs | Planting too far ahead |
| Double pole | Both poles plant, then legs drive through | Very steep steps or short powerful sections | Leaning body weight onto locked arms |
| Asymmetric | One pole manages an off-camber or stepped line | Technical terrain | Forgetting the free pole around other runners |
| Carry | Poles stay secured while terrain requires hands or quick footwork | Scrambles, descents, aid stations | Carrying loose tips toward others |
I plant near the body, keep the shoulders low, and push behind rather than reaching far forward. A distant plant adds braking and can pull me into a fold. I also learn the event’s pole rules and practice safe passing before race day.
Poles do not erase pack movement. My no-bounce pack setup helps me keep the load centered so the upper body can transfer force instead of stabilizing a swinging bag.
How I Adapt Technique to Terrain
| Terrain | My adjustment | What I avoid |
|---|---|---|
| Smooth moderate climb | Quick compact steps and normal arms | Switching too early without testing the speed gap |
| Very steep dirt | Hands on thighs or poles, whole-foot pressure | Long lunges and waist folding |
| Rock steps | Choose stable surfaces and step height I can repeat | Leaping every step |
| Loose gravel | Gentle push and slightly shorter stride | Aggressive toe-off that spins the surface |
| Mud | Continuous momentum and low steering demand | Sudden acceleration |
| Off-camber | Stay over usable grip and widen only as needed | Leaning uphill from the waist |
I never let hiking speed remove the need to read the trail. When terrain becomes highly technical, I prioritize stable placement and consequences over workout targets. A clean split is not worth a fall or trail damage.
How I Train Power Hiking
I train the gait through crossover work, sustained aerobic hiking, short steep power, and transitions over the crest. I tested this framework by keeping the hill and effort target consistent while changing one gait or technique variable.
Session 1: run–hike crossover repeats
I choose a climb that takes two to four minutes. On one repetition I run at sustainable effort; on the next I power hike at the same perceived effort. I record time, heart rate when useful, breathing, and how quickly I can run after the crest. Four to six total repetitions are enough.
Session 2: sustained aerobic hiking
I use a long hill or inclined treadmill for 20 to 40 minutes at controlled aerobic effort. I focus on continuous rhythm, breathing, and posture. This is not a calf-burning contest. I want a gait I could use repeatedly in a long trail day.
Session 3: short steep power
I hike six to ten repeats of 20 to 45 seconds on a steep stable grade with full walk-down recovery. I emphasize forceful compact steps and clean hand timing. I stop before posture or traction deteriorates.
Session 4: transition practice
I alternate 60 to 90 seconds of hiking with 60 to 90 seconds of running on rolling terrain. The key is the first ten seconds after each switch. I want the new gait to appear smoothly rather than through a surge.
I place these sessions inside my running training framework and use my strength guide for the calf, quadriceps, glute, and trunk capacity that supports uphill work. Strength assists the skill; it does not replace practicing the gait.
My Six-Week Power Hiking Plan
I build technique first, duration second, and race-specific transitions last. I use one focused session weekly and add brief hiking practice inside an easy trail run.
| Week | Focused session | Secondary practice | My progress check |
|---|---|---|---|
| 1 | 4 crossover repeats | Posture and compact-step drills | I can switch without losing rhythm |
| 2 | 5 crossover repeats | Hands-on-thighs practice | Speed gap becomes clear |
| 3 | 20–30 min aerobic hike | Short crest transitions | Effort stays stable |
| 4 | 6–8 short steep repeats | Pole practice if relevant | Force rises without form loss |
| 5 | 30–40 min aerobic hike | Run–hike rolling intervals | I run smoothly after the crest |
| 6 | Course-specific mixed climb | Fuel and gear rehearsal | Decision survives mild fatigue |
Runners moving from road to trail can use my road-to-trail progression to build uneven-surface exposure alongside this plan. I do not add steep hiking volume, technical terrain, and a large weekly-mileage increase at the same time.
How I Measure Progress
I measure more than uphill time. A faster split can come from a harder effort, better conditions, or poor pacing that damages the next kilometer. I want a stronger system, not one impressive hill.
- Speed at matched effort: I compare the same segment in similar conditions.
- Run–hike crossover: I identify the grade and fatigue state where hiking becomes competitive.
- Crest recovery: I time how quickly I regain a smooth run after the hill.
- Movement quality: I track posture, step continuity, and foot placement.
- Next-day response: I check calf, Achilles, knee, hip, and back against my normal baseline.
Cadence can describe rhythm, but I never chase a universal number. My cadence guide explains why pace, grade, and body dimensions must travel with the number.
How I Use Power Hiking in a Race
Before the race
I mark likely hiking climbs from the course profile, rules, and reconnaissance. I practice the planned method with the same shoes, pack, poles, fueling, and expected fatigue. I also identify climbs that look steep on paper but remain runnable on good trail.
Early climbs
I switch before ego raises the cost. Passing hikers while running is not automatically a gain if they pass me after the crest. I judge the whole climb-plus-exit segment and keep the effort appropriate for race duration.
Late climbs
I simplify: compact steps, steady breathing, one line, and deliberate fueling. Hiking can create a useful window to eat or drink, but I practice doing so without losing posture. My trail fueling guide and trail hydration guide cover the quantities and planning.
Over the crest
I shorten the final hiking steps, bring the arms back into running rhythm, and start with a controlled shuffle before accelerating. I do not sprint the instant the grade softens. A smooth ten-second transition is more valuable than a dramatic first step followed by recovery.
I also remember that the descent carries its own cost. My downhill knee-load guide helps me avoid spending every saved uphill minute through uncontrolled braking later.
My Power Hiking Gear Buying Guide
I choose gear that preserves traction, foot security, and access to essentials without interfering with arm drive. Gear supports the gait; it does not determine when I should switch.
My trail running-shoe guide prioritizes outsole grip, secure upper hold, protection, and terrain match. On steep grades I pay special attention to heel security uphill and toe room for the descent.
For carrying, I use my trail hydration-vest guide and keep dense items close to my back. I place food and soft flasks where I can reach them without breaking rhythm. When mud or debris repeatedly enters the shoe, my trail gaiter guide helps decide whether the added layer earns its place.
Mistakes I Avoid
- I do not wait for collapse: the best transition happens while I still control posture and breathing.
- I do not lunge: long steps raise muscular cost and reduce traction options.
- I do not fold at the waist: I lean with the hill while keeping room to breathe.
- I do not push on the kneecaps: hands belong on the lower thighs.
- I do not plant poles far ahead: a distant plant adds braking and shoulder tension.
- I do not chase one cadence: rhythm changes with grade and terrain.
- I do not stop training at the crest: the return to running is part of the skill.
- I do not call every walk power hiking: I track recovery walking honestly when that is what I need.
When I stop the session: I step back for sharp pain, focal bone tenderness, swelling, numbness, dizziness, chest symptoms, or a gait change I cannot control. Power hiking changes the task; it does not make pain safe or diagnose its cause.
Frequently Asked Questions
What is power hiking?
I define power hiking as deliberate, forceful uphill walking used to preserve useful speed, control, and effort when running becomes inefficient. It is not a recovery stroll; I keep posture active, steps compact, and the transition purposeful.
When should a trail runner power hike?
I switch when running no longer creates enough extra speed to justify its higher effort, when foot placement deteriorates, or when the consequence of a mistake rises. I make the decision before my stride collapses.
Is power hiking faster than running uphill?
It can be on steep or technical grades, especially when my running becomes a slow bound. On runnable grades, running may remain faster. I compare both gaits on the same hill at similar effort and use the one that gives me the best speed, control, and recovery cost.
Should I put my hands on my knees when power hiking?
I place my hands on the lower thighs, not directly on the kneecaps. I time each push with the opposite leg, keep elbows slightly bent, and remove the hands when the grade becomes shallow enough for a normal arm swing.
Are trekking poles better than hands-on-thighs hiking?
Neither is universally better. Poles can share work with the upper body and improve rhythm, but they require skill and can become clutter on technical ground. Hands-on-thighs needs no equipment and works well on very steep, stable climbs. I choose by course rules, terrain, duration, and practice.
What cadence should I use for power hiking?
I do not chase one number. My useful cadence changes with grade, step height, footing, leg length, and fatigue. I want compact continuous steps without bouncing, lunging, or pausing between contacts.
How do I train power hiking without mountains?
I use an inclined treadmill, stadium stairs, a bridge, or repeated short hills. I match effort and movement quality rather than pretending the treadmill grade perfectly reproduces outdoor terrain. Strength work supports the motion, but I still practice the actual gait.
Does power hiking count as running training?
Yes, when it serves the demands of trail running. It can build aerobic time, uphill-specific strength endurance, and gait-switching skill. I still track it honestly because hiking pace and muscular demand differ from running on level ground.
Final Verdict
My final verdict is that power hiking belongs in a trail runner’s skill set because the fastest sustainable gait changes with grade, terrain, and fatigue. I switch when running loses its meaningful speed advantage, movement quality falls, or consequences rise.
The technique is straightforward but worth practicing: compact continuous steps, whole-body alignment with the hill, secure foot pressure, active arms, and breathing set before the effort runs away. I add hands on thighs or poles only when they improve that system.
I judge the choice beyond the top of the climb. If I reach the crest controlled and can return to running smoothly, the hike did its job.
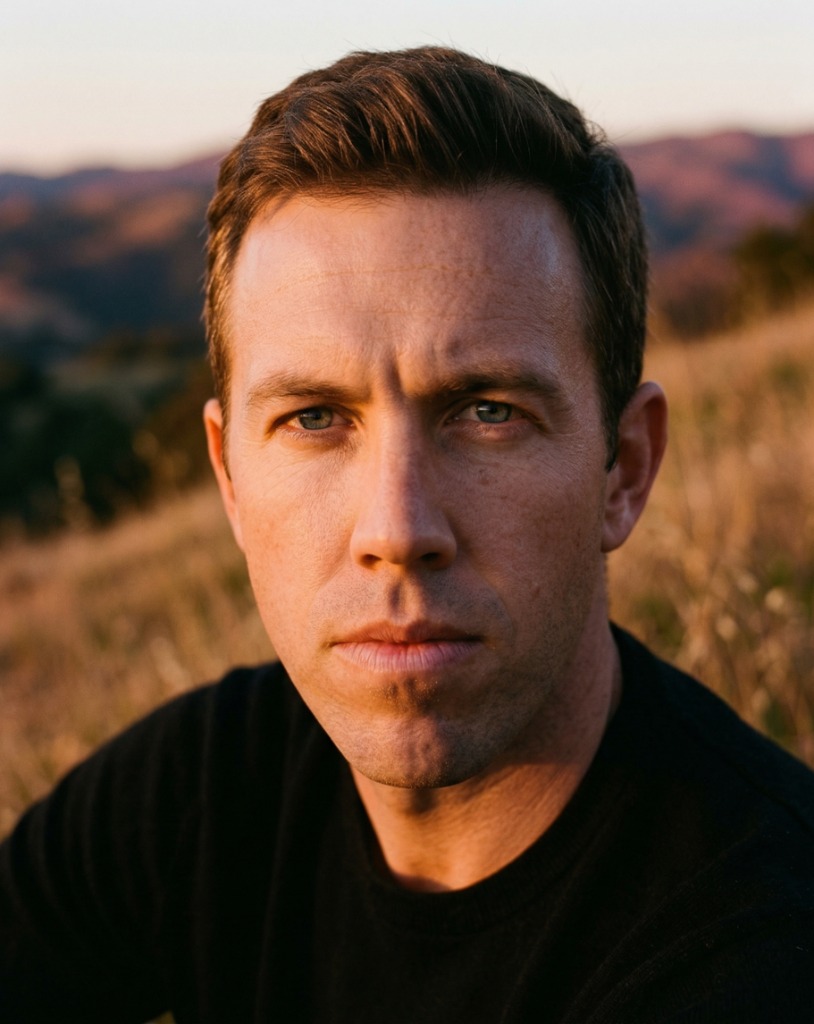
Written by Ken — 12 years of running, 12,500+ miles, 63 shoes tested, and 36 races from 5Ks to a 50K ultra. I run 30–40 miles a week and evaluate fit, heel security, toe room, ride, and late-run stability with real training miles. I am not a physician or podiatrist; medical claims in this guide are sourced and the limits are stated. More about me →
Pingback: Hill Running Tips: How I Climb, Crest, and Descend with Control | NextGait