
Trail running alone safety is not a packing list. It is a chain of decisions that starts before I leave, continues at every junction, and ends only when my contact knows I am back. After 12 years of running, I still enjoy solo trail days—but I never treat fitness, a GPS watch, or confidence as substitutes for margin.
I use a simple Leave–Run–Return system. Before I leave, I decide whether today, this runner, and this route belong together. While I run, I protect position, time, temperature, and decision quality. When I return, I close the trip plan and learn from anything that narrowed my margin.
This is not a promise that solo running can be made risk-free. It cannot. My goal is more practical: prevent avoidable problems, recognize deterioration early, and make rescue easier if self-rescue is no longer sensible.
My short answer: I run a trail alone only when I know the route and its exits, the full weather window fits, someone has an actionable trip plan, and I can turn back with time and supplies in reserve. If one of those pieces is missing, I choose a shorter, more accessible route or run with company.
My solo safety card in 60 seconds
Before a familiar local run, I can make the essential decision quickly. A longer or more remote route deserves a full review, but the same six questions still govern it.
| Question | My minimum standard | If the answer is no |
|---|---|---|
| Can I describe the route without relying on one device? | I know the major junctions, terrain, exits, and turnaround point | I study it, choose a simpler route, or go with someone |
| Do the conditions fit the whole outing? | Weather, daylight, water, closures, and surface are acceptable through my return window | I shorten, relocate, or cancel |
| Am I a good match for this route today? | I am healthy, alert, adequately recovered, and technically capable | I switch to an easy, accessible run |
| Can someone act on my trip plan? | One person has the exact route and an escalation time | I do not start until this is fixed |
| Do I have independent backups? | Navigation, communication, light, warmth, water, and calories are not dependent on one fragile item | I add the missing layer or reduce consequence |
| Is there real margin? | I can absorb delay, a wrong turn, weather change, or slower movement | I choose the conservative version |
My rule is blunt: if the plan works only when everything goes right, it is not a solo plan.
How I judge risk when I run trails alone
I use three lenses—hazard, exposure, and consequence—because “Is this trail safe?” is too vague to guide a decision. This is a judgment framework, not a numerical score.
Hazard is what can cause harm: lightning, heat, cold, a fall, fast water, loose rock, wildfire, wildlife, traffic, or another person. Exposure is how likely I am to meet that hazard and how long I remain exposed. Consequence is what happens if the problem occurs at that location and time.
A wet root is a hazard on any wooded trail. On a busy park loop ten minutes from a road, the consequence of an ankle injury may be limited. The same injury on a remote ridge near sunset is a different problem. My fitness may shorten exposure, but it does not move the ridge closer to help.
I then look for margin: spare daylight, warmth, water, food, battery, route options, and physical capacity. Margin is what converts an unexpected event from an emergency into an inconvenience. I do not spend it at the trailhead by starting late, under-equipped, or already fatigued.
Phase 1 — Leave: earn permission to start
Before I leave, I match my current capacity to the route, inspect the full conditions window, send a useful trip plan, and carry backup systems that fit the consequence of a delay.
Match the route to today’s version of me
I do not ask whether I have ever completed something harder. I ask whether I am prepared for this route today. Poor sleep, illness, unusual fatigue, life stress, soreness, heat adaptation, technical confidence, and recent training all matter.
I pay particular attention to symptoms that affect judgment or movement. I will not start a remote solo route when I am dizzy, feverish, unusually short of breath, confused, impaired, or carrying pain that changes my gait. A higher-than-usual baseline can be useful context, but I interpret it alongside how I feel rather than letting one wearable number make the decision; that is the same approach I use when tracking resting heart rate for runners.
For effort, I choose a ceiling before I start. A solo exploration day is not the day to chase pace on every climb. I use the principles in my guide to training by effort instead of pace and preserve enough capacity to solve a navigation or weather problem calmly.
Build route knowledge, not just a downloaded line
I review the route at a scale that shows its relationship to roads, ridges, drainages, boundaries, junctions, and settlements. I note the direction of travel, total distance, where the elevation gain occurs, technical sections, reliable water, bailout points, no-service areas, and any place where turning back becomes difficult.
I also check the responsible land manager for closures, fire restrictions, hunting information, permits, seasonal hazards, and trail conditions. Crowd-sourced reports can add context, but they do not overrule an official closure.
Before a remote solo outing, I want a primary route on an offline map, a second way to identify position, and enough map understanding to use both. My trail running navigation basics explains the junction routine and map skills I practice before I need them.
Use my one-new-variable rule
Distance, technicality, remoteness, darkness, weather, altitude, and unfamiliar navigation all add cognitive or physical load. When I am expanding my range, I change only one major variable at a time.
| If this is new | I keep these familiar | My first progression |
|---|---|---|
| Longer duration | Route, weather, daylight, and surface | Add a modest out-and-back with easy exits |
| Technical terrain | Distance, daylight, and route familiarity | Practice a short section near access |
| Remote terrain | Distance, conditions, and navigation method | Go with a capable partner first |
| Low light | Route and surface | Use a familiar loop with two lights |
| Mountain weather | Route and turnaround logic | Choose a shorter route below exposed terrain |
| Solo running itself | Route, duration, and conditions | Repeat a known, busy trail |
This is also how I progress runners toward mountain running: skill and consequence should not increase on the same day.
Check the whole weather and daylight window
I check conditions at the most exposed part of the route, not only at the trailhead. Temperature, precipitation, wind, lightning timing, heat index, air quality, snow, mud, stream levels, and wildfire conditions can change the route’s identity.
For convective weather, I decide where exposed terrain begins, what the last protected turnaround point is, and what time I must be below it. If thunder is possible, my detailed trail running thunderstorm plan governs the day. When I hear thunder, I stop the objective and head for a substantial enclosed building or hard-top vehicle if one is reachable; no outdoor spot is reliably safe in a thunderstorm. I never treat a weather app as permission to continue after the sky contradicts it.
I calculate usable daylight from the time I expect to move at my conservative pace. Sunset is not my target finish time. My buffer includes navigation pauses, a slower descent, and the possibility that I will walk.
Send an actionable trip plan
“Running in the park, back later” cannot guide a search. I send one reliable person a concise plan they can act on, and I confirm that they received it.
| Trip-plan field | What I send | Why it matters |
|---|---|---|
| Exact start | Trailhead name, pin, parking area, and vehicle description | Narrows the first search area |
| Intended route | Map or track, direction, distance, and major junctions | Shows where I should be |
| Timing | Start, expected check-in, hard turnaround, and escalation time | Separates ordinary delay from overdue |
| Appearance | Clothing, pack color, and current photo when appropriate | Helps identification |
| Devices | Phone number, satellite device identity, and tracking link | Gives responders usable communication context |
| Relevant context | Medical or mobility information I choose to share | Helps the contact communicate clearly |
| Escalation action | Who to call and what information to provide | Prevents indecision when I am overdue |
The message I send: “I am starting at [trailhead/parking pin] at [time]. My route is [map link and direction], with [key junctions] and [turnaround time]. I expect to check in by [time]. If you cannot reach me by [escalation time], call [local emergency service or land authority] and share this route, my vehicle, clothing, and tracking details.” I confirm my contact has received it before leaving.
I use two clocks. The check-in time is when I expect to report that I am safe. The escalation time is when my contact should begin the agreed action if they cannot reach or locate me. The buffer must account for normal delay without becoming so large that it defeats early response.
I never change routes silently. If I have service and make a meaningful change, I update my contact. If I cannot send the change, I stay with the filed plan unless doing so is less safe.
Build communication in layers
My phone is useful, not infallible. No signal, cold, water, impact, battery drain, or an inaccessible pocket can remove it. For routes where delayed communication has serious consequences, I add a satellite messenger or personal locator beacon and practice its basic functions before the run.
Live tracking is a convenience layer, not a rescue contract. A dot can freeze when the device loses signal or power. My contact follows the agreed times and route, not an assumption that a static dot means I am resting.
I carry key details outside the phone: an emergency contact, essential medical information, and any device instructions my contact needs. I know the local emergency number and the land agency or jurisdiction responsible for the area.
Pack for consequence and access
A good kit matches the route rather than a universal checklist. My systems cover navigation, communication, light, temperature protection, first aid, food, water, sun, repair, and signaling. I build the medical layer with the same practical logic as my trail running first-aid kit: items must address realistic problems and I must know how to use them.
| System | Familiar local trail | Longer or consequential route | Access rule |
|---|---|---|---|
| Navigation | Offline map plus watch or simple backup | Offline map, backup power, and independent reference | Map works in airplane mode |
| Communication | Charged phone and trip plan | Phone plus tested satellite layer when warranted | Device reachable with either hand |
| Light | Small light if delay could reach dusk | Primary headlamp plus backup light | Not buried below spare clothing |
| Temperature | Layer for a short delay | Wind/rain shell, insulation, and emergency shelter as conditions demand | Warmth available before I become clumsy |
| Water and food | Planned amount plus modest reserve | Reserve and treatment where reliable water exists | Fuel and water usable without unpacking |
| First aid and repair | Personal essentials | Bleeding, wound, blister, medication, and simple repair needs | Critical items grouped and identifiable |
| Signaling | Whistle | Whistle, light, and satellite SOS when justified | Attached, not loose |
Fit is part of safety. A bouncing vest wastes energy and makes frequently used items harder to reach, so I set it up using my hydration vest fit guide. Footwear should match the actual surface; my comparison of road vs trail running shoes and guide to shoes for technical terrain explain when grip, hold, and protection become consequential.
Poles can add stability and reduce costly stumbles, but only if I have practiced deploying and stowing them. I do not debut them on a remote route; I learn how to use trekking poles for trail running close to home first.
Phase 2 — Run: protect the margin
While I run, I verify the plan early, confirm my position at junctions, obey the turnaround triggers I set at home, and stop a small problem before it becomes a remote emergency.
Treat the first ten minutes as a verification lap
The start is my final check, not a ceremonial green light. I notice breathing, coordination, soreness, pack movement, shoe security, temperature, surface, and whether the route matches the report.
If my body or the conditions disagree with the plan, I adjust immediately. Turning around ten minutes in is cheap. Trying to rescue an ambitious plan two hours later is not.
Keep my position known at every junction
At a junction, I stop moving long enough to confirm the decision. I match trail features to the map, check direction, and look back so the return view is familiar. I do not follow footprints, another runner, or a watch arrow without verifying context.
If I become uncertain, I stop. I do not let forward motion turn uncertainty into distance. I check the last known point, map, terrain, and time. If I cannot resolve the position calmly, I return along the confirmed path while I still can.
Short, deliberate pauses cost seconds. Recovering from a confident wrong turn can cost hours.
Use decision triggers, not mood
I decide the stop conditions at home because fatigue, summit fever, and sunk-cost thinking are persuasive on the trail.
| Trigger | My immediate action | Why I do not negotiate |
|---|---|---|
| Thunder, rapidly building storm, smoke, or official closure | Seek substantial enclosed shelter for thunder; use the safest exit for smoke or closure | Conditions can outrun fitness |
| Hard turnaround time reached | Turn around, even if the goal is close | Daylight and contact plan are safety systems |
| Position remains uncertain after a deliberate check | Stop, backtrack to the last confirmed point, or seek help | More movement enlarges the search area |
| Water or fuel reserve is being consumed early | Shorten at the next safe option | The reserve is for delay, not ambition |
| New altered gait, dizziness, confusion, chest pressure, faintness, or severe breathing difficulty | Stop, assess, and escalate according to severity | Continuing can remove self-rescue capacity |
| Repeated stumbles or declining judgment | Reduce pace and take the safest exit | Coordination loss is an early warning |
| Communication or navigation redundancy fails | Reduce the route to match the remaining system | One failure should not be allowed to create several |
Heat illness and dehydration can impair judgment before a runner fully appreciates it. I use the early signs in my guide to dehydration in runners, but severe confusion, collapse, fainting, or inability to keep fluids down calls for urgent help—not a training adjustment.
Move for control, especially downhill
On technical descents I shorten stride, keep my eyes scanning ahead, and protect the ability to change line. I do not chase a downhill split when I am alone. My detailed cues for descending technical trails are built around control, not bravado.
I also leave room for other users and the trail itself. Yielding, keeping wildlife wild, respecting closures, and carrying out waste are part of my Leave No Trace approach for trail runners. A safer runner does not create risk for everyone else.
Handle wildlife and people without theater
Wildlife behavior varies by species and region, so I check local land-manager guidance before the run. I avoid surprising animals, control food and waste, give them space, and never approach young. If an encounter occurs, I use the local species-specific guidance rather than a generic internet slogan.
With people, I trust behavior and context, not stereotypes. I keep enough distance to choose my line, avoid sharing unnecessary details about being alone, and leave early if an interaction feels wrong. I do not worry about appearing rude. A populated route is not automatically risk-free, and a quiet route is not automatically threatening; I stay observant without turning the run into a fear exercise.
Use a calm incident ladder
When something goes wrong, my first job is to stop the chain from growing. I move out of immediate danger if I can do so safely, then assess location, injury, weather, light, communication, and whether movement is likely to improve or worsen the situation.
| Situation | My decision | Communication |
|---|---|---|
| Minor problem, stable, route confirmed | Treat it, shorten, and leave by the safest known route | Update my contact when possible |
| Unable to continue normally but stable | Protect warmth, conserve resources, and choose self-rescue only if it is clearly safer | Send precise location and status |
| Lost but not in immediate danger | Stop moving, shelter as needed, and work from the last known point | Contact my person or authorities before battery becomes critical |
| Serious injury, severe symptoms, immediate environmental threat, or self-rescue likely to worsen harm | Activate SOS or call local emergency services | State location, problem, people, hazards, and resources |
| SOS sent | Stay locatable unless remaining creates greater danger | Follow responder instructions and conserve battery |
An SOS is not a text message that I fire and then outrun. After activating it, I keep the device able to see the sky, remain available for questions, make myself visible, and avoid moving unless the location itself is dangerous or responders direct me.
Phase 3 — Return: close the system
The run is not finished when my watch stops. I send the agreed “safe” message immediately. If I am delayed but safe, I update my contact before the escalation time. I never assume live tracking has done that job.
I then run a two-minute debrief:
- Where did the route or conditions differ from my plan?
- Did I use reserve water, food, light, warmth, or battery?
- Was any essential item hard to reach or operate?
- Did I miss a junction, rush a decision, or ignore an early cue?
- What single change would create more margin next time?
I recharge devices, replace used supplies, dry the pack, and update maps before memory fades. This small reset prevents yesterday’s used bandage or empty battery from becoming tomorrow’s hidden failure.
How I progress from local solo runs to bigger days
I earn remoteness. I start with daylight runs on familiar, well-used routes with frequent exits. Then I add duration, technical terrain, elevation, lower traffic, or low light one variable at a time. Before a bigger solo day, I often reconnoiter the route with company or enter an organized event; my first trail race checklist is useful because aid, course markings, and cutoff planning expose gaps without pretending a race is identical to solo travel.
| Stage | Route standard | Skill I must demonstrate before progressing |
|---|---|---|
| 1. Familiar loop | Daylight, busy, close to access | Trip plan, gear access, and consistent junction checks |
| 2. Familiar extension | More time, same terrain, multiple exits | Fuel, water, pacing, and turnaround discipline |
| 3. New local route | Daylight and forgiving consequence | Offline navigation and calm correction |
| 4. Technical or low-light practice | Short and close to access | Footwork, lighting, and backup use |
| 5. Remote route with company | Consequential terrain, conservative conditions | Communication, emergency procedure, and route judgment |
| 6. Conservative solo objective | Known skill demands with generous margin | Repeatable decisions under fatigue |
This ladder has no graduation ceremony. If conditions, health, or equipment reduce my margin, I move down a stage without embarrassment.
Three examples of the decision, not just the gear
Familiar park loop, mild morning
I still send the location and return window, carry a charged phone, and use an offline map. Because exits are frequent and consequence is low, the kit can be compact. I do not add remote-route equipment merely to look prepared; I make the system proportional.
Unfamiliar ridge with afternoon storms possible
This combines unfamiliar navigation, exposure, and changing weather. I would first reduce variables: start earlier, choose a lower alternative, go with a capable partner, or postpone. A satellite messenger does not turn a bad weather window into a good plan.
Long technical loop after a poor night of sleep
The route did not change, but the runner did. I replace it with a familiar easy route or rest. The sophisticated choice is not finding enough motivation; it is recognizing that judgment and foot placement are part of the equipment.
Frequently asked questions
Is trail running alone safe?
It can be managed responsibly, but it can never be guaranteed safe. I reduce risk by matching the route to my current ability, checking conditions, leaving an actionable trip plan, carrying independent backups, and preserving enough margin to turn around early.
Should I share live tracking on every solo trail run?
I use it when available, but never as the only plan. A contact still needs my intended route, expected check-in, escalation time, and action instructions because tracking can freeze when signal, battery, or the device fails.
Do I need a satellite messenger?
Not for every park loop. I consider one when mobile coverage is unreliable and delayed communication would materially increase consequence. Ownership is not enough: I test messaging, tracking, SOS access, contacts, and subscription status before relying on it.
What should my emergency contact do if I am overdue?
They should follow the specific plan we agreed: try the defined contact methods, check the tracking link without assuming it is current, and at the escalation time contact the appropriate local emergency service or land authority with my route, vehicle, timing, appearance, and medical context.
How much extra food and water should I carry?
I base the reserve on heat, duration, water reliability, pace uncertainty, and the consequences of delay rather than a universal percentage. If my plan consumes the reserve during an ordinary run, I chose too little or waited too long to shorten.
What if I realize I am lost?
I stop moving, protect myself from immediate environmental risk, and establish the last confirmed location. I use map and terrain together, conserve battery, and communicate early. Random forward motion makes both navigation and any search harder.
When should I activate SOS?
I activate SOS or call local emergency services for a serious injury or illness, immediate threat, or situation where self-rescue is unavailable or likely to cause greater harm. I provide precise information, follow instructions, remain locatable, and move only if staying creates more danger.
Is carrying more gear always safer?
No. Equipment that I cannot reach, operate, or carry efficiently can create false confidence. I carry the systems the route demands, practice with them, place critical items where I can access them, and change the route when no reasonable kit can create adequate margin.
My bottom line
I do not prove independence by refusing help. I prove judgment by creating options before I need them.
My solo trail standard is simple: earn permission to leave, protect margin while running, and close the plan when I return. When a route demands perfect weather, flawless navigation, full speed, or blind faith in one device, I change the route. The best solo day is not the biggest one I can survive; it is the one I can manage calmly from first decision to final check-in.
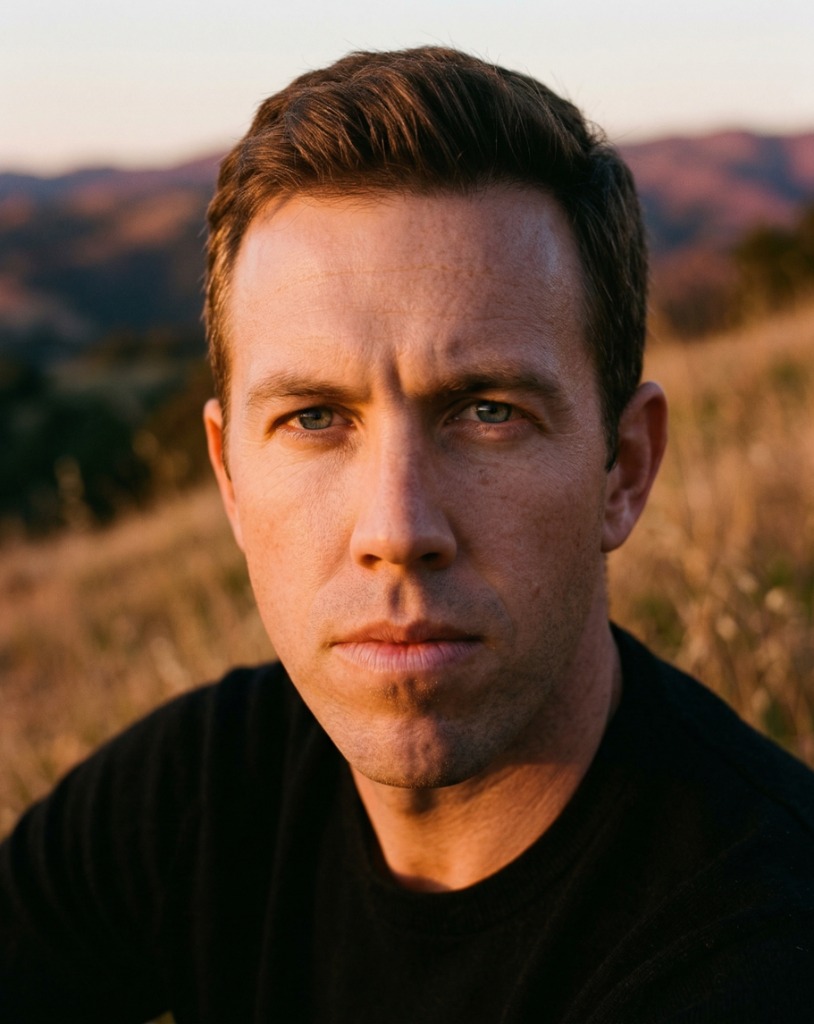
Written by Ken — the runner behind NextGait. I use 12 years of running experience to make solo trail decisions conservative, actionable, and repeatable from departure to check-in. More about me →